“Catching small spring roof issues now can save Niagara homes from costly repairs after heavy rains.” – Fiddler Roofing Expert
Did you know? More than half of all roof leaks in Niagara Falls are reported in spring and early summer—right after heavy snow melt and the season’s first big rains. Spotting and addressing minor roof issues now can prevent costly repairs and insurance claims later, keeping your home dry and safe year-round.
What You’ll Learn in This Spring Roof Inspection Checklist Guide
How to perform a thorough spring roof inspection checklist tailored for Niagara Falls homes
The role of roof maintenance and a proper spring roof inspection in preventing water damage
Key signs of roof problems after winter and how to address them
When to call a pro or roofing contractor for further roof repair or maintenance
Why Spring Roof Inspections Are Critical in Niagara Falls
The Impact of Niagara Weather on Roof Maintenance
Niagara Falls is notorious for its lake-effect snow, freezing winters, and blustery spring winds. These environmental factors can put immense stress on any roofing system. Ice dams, formed by melting and refreezing snow, are among the top culprits for water damage and deteriorating roofing materials. The transition from harsh winter to wet spring exposes vulnerable areas of your roof, such as flashing and sealants, making timely spring roof inspection checklist tasks more important than ever. Regular inspections allow you to maintain your roof’s integrity and prevent water from seeping through small gaps left over from winter’s worst.
Overlooking even minor issues as you transition to spring can mean hidden mold growth, granule loss, and weakened shingles. These overlooked spots can quickly escalate, turning what would have been a simple roof repair into a full roof replacement. That’s why local experts emphasize putting roof maintenance at the top of your spring home care priorities—especially for homeowners looking to extend the life of their roofing system and ensure your roof performs as your property’s first line of defense.

Risks of Delaying Your Spring Roof Inspection Checklist
Delaying your spring roof inspection can lead to a host of hidden and expensive problems. As warm rain replaces snow, undetected winter wear like missing shingles, sagging rooflines, or clogged gutter systems can become costly repairs almost overnight. Water damage from melting snow and blocked gutters may not be immediately noticeable but can soak into insulation, prompting mold growth and even compromising attic ventilation systems.
Additionally, the risk of insurance claim denials increases when evidence of neglected roof maintenance is apparent. Many property owners only notice leaks after significant storms, by which time damage is already severe. A comprehensive spring roof inspection checklist is your best bet for catching these issues early and protecting your investment against Niagara’s unpredictable spring weather.
See the benefits in action: Short explainer on spring roof inspection checklist benefits for Niagara Falls homes (Insert local video here)
As you work through your spring roof inspection, it’s equally important to be aware of common pitfalls when hiring professionals for repairs or replacements. For practical advice on avoiding unnecessary expenses and ensuring you choose the right expert, consider reviewing these essential tips to avoid costly roofing contractor mistakes before making any major decisions.
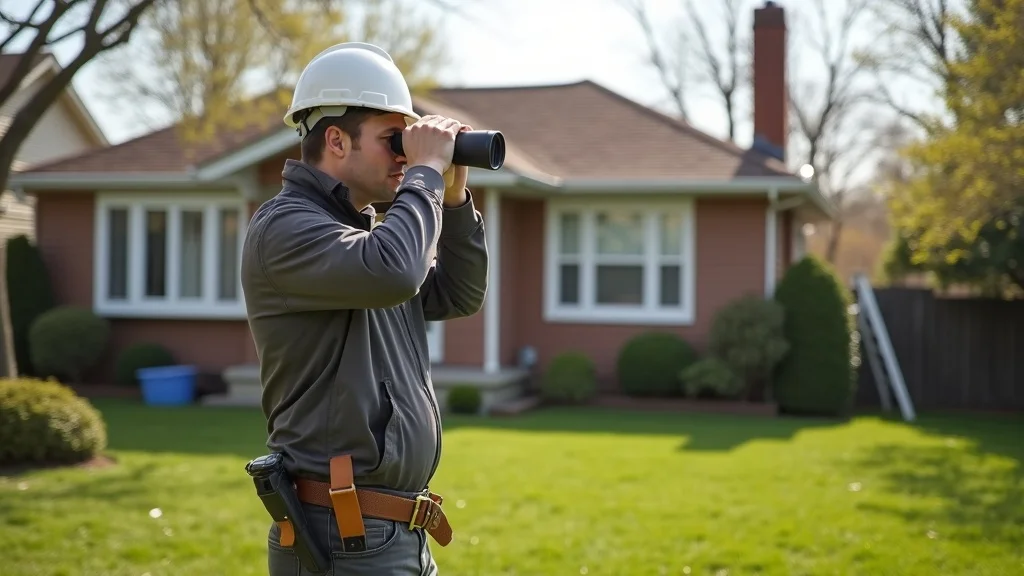
1. Starting Your Spring Roof Inspection Checklist: Ground-Level Visual Inspection
Inspecting Your Spring Roof for Visible Damage
The first and perhaps easiest step on your spring roof inspection checklist is a ground-level visual inspection. This allows you to check for obvious signs of damage and evaluate your roof’s general condition without ever leaving the lawn. Start by walking around the perimeter of your home with a keen eye—and a pair of binoculars if possible.
Look specifically for missing shingles, lifted tabs, or “bald” spots that expose the underlayment. Such gaps mean your roof’s defenses have been compromised, leaving it vulnerable to leaks after spring’s first heavy rain. Next, check areas around gutters and downspouts for the telltale sandy residue of granule loss, which signals that your shingles could be nearing the end of their lifespan. Finally, scan the ridge and eaves for any dips or sagging, as these structural warning signs could mean residual snow loads have weakened your roof frame—or, worse, that water damage is setting in beneath the surface.
Missing or damaged shingles and what they mean for roof maintenance
Identifying signs of roof repair needs from the ground
Recognizing granule loss and sagging rooflines for spring roof safety
Common Roof Problems Spotted During Ground-Level Spring Inspections | ||
| Problem | What It Looks Like | Why It Matters |
|---|---|---|
| Missing Shingles | Bare roof spots, visible underlayment | Invites leaks and reduces wind resistance |
| Granule Loss | Sandy debris at downspouts, “bald” shingle surfaces | Signals roofing material is wearing out |
| Sagging Rooflines | Unusual dips, uneven ridges or eaves | Indicates structural movement or hidden water damage |
| Loose Flashing | Metal sticking up near chimneys/vents | Common source of leaks |
| Clogged Gutters | Overflow or plant growth at gutter edge | Prevents proper drainage, can lead to rot |
2. Gutter and Downspout Review in Your Spring Roof Inspection Checklist
Gutters and Downspouts: Preventing Water Damage
The importance of gutters and downspouts in roof maintenance cannot be overemphasized—especially after a Niagara Falls winter. Melting snow and seasonal ice dams can fill gutters with debris and force water under shingles, speeding up roof decay and threatening your foundation if left unchecked. The spring roof inspection checklist must include cleaning and evaluating your home’s drainage system.
Begin by removing leaves, twigs, and sediment—clogged gutters are a major contributor to overflow and water backup. Next, inspect for signs of sagging or gutters pulling away from the fascia, which could indicate damage from heavy snow or ice dams. Lastly, clear and test your downspouts by flushing them with water to ensure proper drainage at least five to ten feet away from the house—this prevents pooling near the foundation, reducing risks of basement flooding and insurance claim headaches down the line.

Clearing out debris for spring roof maintenance
Repairing or reinforcing sagging gutters and preventing water damage
Ensuring proper drainage away from your foundation
3. The Attic: Early Warning Signs During a Spring Roof Inspection Checklist
Spotting Signs of Water, Stains, and the Importance of Attic Ventilation
One of the smartest steps in any spring roof inspection checklist is to head into the attic. This vantage point reveals leaks, heat loss, and hidden mold that ground-level checks might miss. On a sunny afternoon, use a flashlight to check for beams of daylight peeking through the roof boards—each pinpoint of light signals a hole that could lead to leaks with the season’s next rain.
Inspect rafters and insulation for dark stains, streaks, or signs of mold growth. Small water spots are early red flags for water damage, often caused by ice dams or failing shingles. As you check, verify that all soffit and ridge vents are free of obstructions—proper attic ventilation plays a pivotal role in preventing moisture buildup, overheating, and premature roof material failure. Consistent airflow, especially after a cold Niagara winter, ensures your shingles and rafters remain dry and resilient when the spring rains arrive.

How to check for active roof leaks or daylight through spring roof boards
Detecting water stains, streaks, or mold in early stages
Ensuring attic ventilation for effective roof maintenance
Watch an expert: Checking attic and soffit vent airflow for spring roof maintenance (Add local Niagara video guide here)
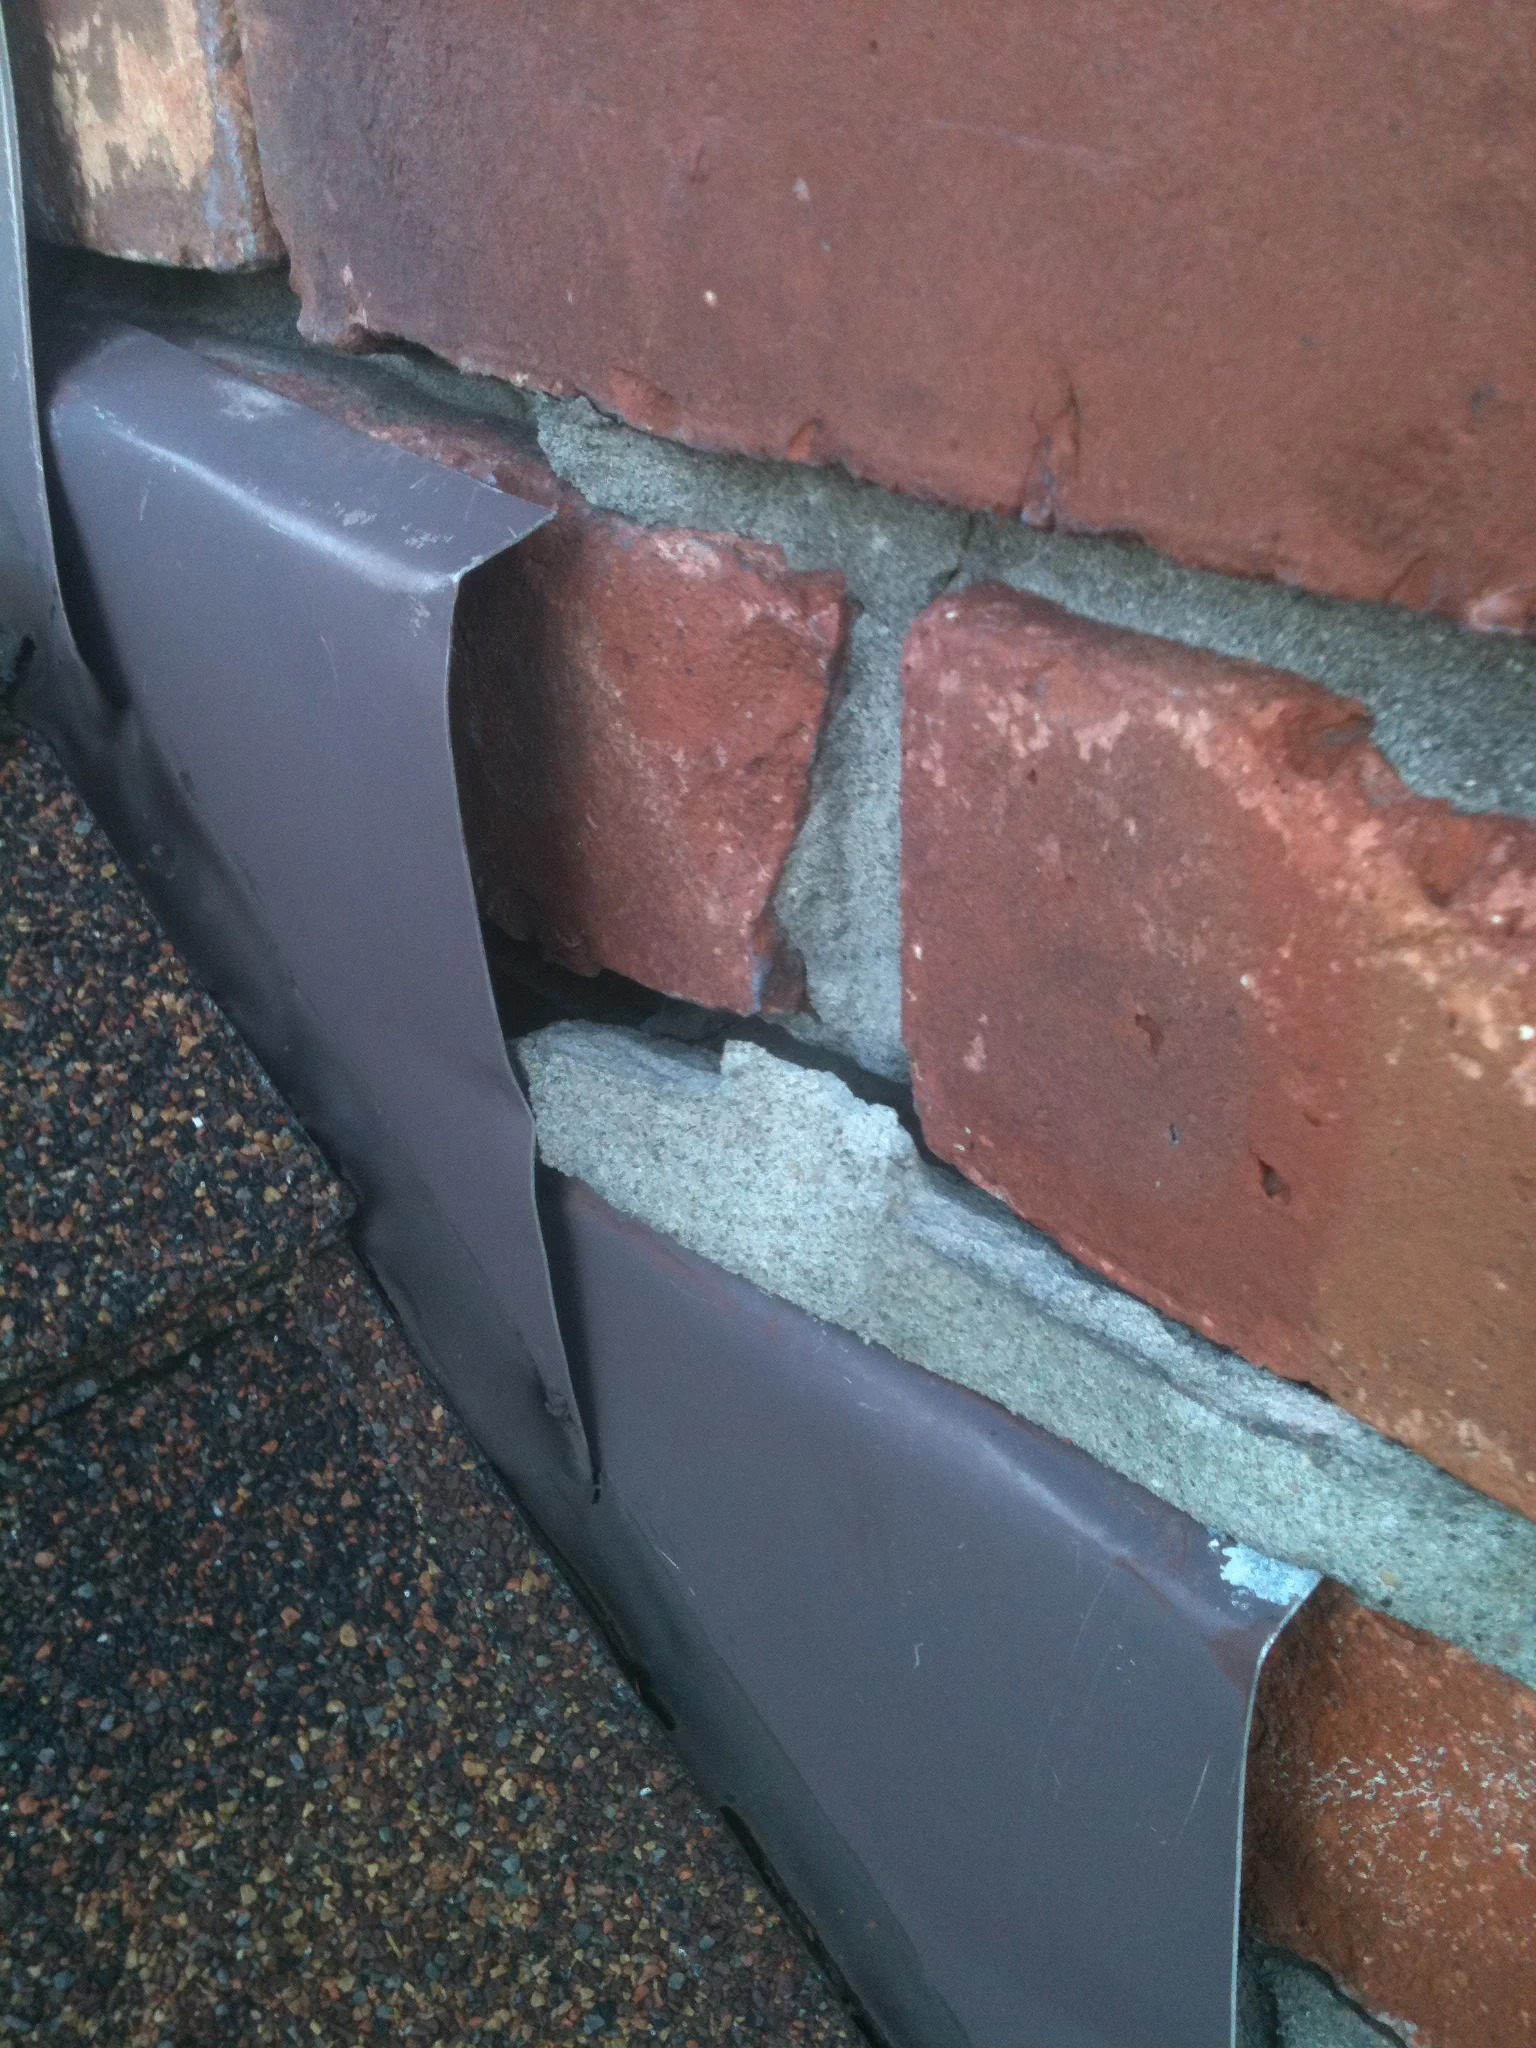
4. Review of Roof Flashings and Seals on Your Spring Roof Inspection Checklist
Inspecting Critical Flashing Points for Roof Repair Needs
Roof flashing protects vulnerable joints at chimneys, vent pipes, valleys, and skylights. In Niagara Falls homes, temperature swings can crack or lift flashing—often causing leaks that aren’t visible until significant water damage occurs. As part of your spring roof inspection checklist, check all metal flashing and sealant for rust, separation, or missing sections. Chimney flashing and pipe boots are especially prone to weather-related deterioration.
If you spot warped or missing flashing, or old sealant that’s dried and pulling away, immediate repair is crucial to maintain your roof’s watertight seal. Addressing minor flashing issues now avoids expensive roof repair or even roof replacement down the road, keeping your roofing system durable for years to come.
Checking pipe boots, chimney flashing, and other roof seal points
Assessing flashing around valleys, skylights, and vents
Material Integrity: Roofing Material Review as Part of Spring Roof Inspection Checklist
When Roof Replacement Becomes Necessary
Unfortunately, some roofs may have sustained enough winter damage to require more than minor repairs. If you see extensive shingle loss, large patches of exposed underlayment, or signs of cracking, curling, and widespread granule loss, a roof replacement could be the safer, longer-term investment. Persistent leaks or repeated issues year after year are indicators that your existing roofing materials are no longer serving as an effective line of defense.
When in doubt, seeking a professional inspection is key. Roofing contractors can accurately diagnose the condition of your roofing system and provide honest recommendations for roof replacement or repair. Acting proactively can save you from repeated interruptions, ongoing water damage, and escalating maintenance costs.
Evaluating Life Expectancy of Common Roofing Materials
The expected lifespan of your roof depends heavily on the roofing material used and how well it’s maintained. Asphalt shingles—Niagara’s most common choice—typically last 20–30 years with proper care. Architectural shingles and metal roofing materials offer even longer durability, but only if they’re inspected and maintained every spring. Look for early warning signs like curling, fading, or cupping, which could mean your roof material is reaching retirement.
Regular spring roof maintenance gives you a clear picture of your roof’s current state, allowing you to budget and plan for necessary upgrades before emergency replacements are needed. By combining seasonal checks with proactive repairs, you ensure your roof’s lifespan aligns with, or even exceeds, industry expectations for Niagara’s unique climate.
When to Call a Pro: Knowing When DIY Isn’t Enough
Selecting a Roofing Contractor for Professional Roof Inspection and Repair
While a DIY spring roof inspection checklist covers many minor issues, some damage is only visible to a trained eye. If you discover missing shingles, active leaks, multiple lines of granule loss, or suspect serious issues with flashing or structure, it’s wise to call a pro. Certified roofing contractors bring not just experience, but also the tools and know-how to assess hidden problems, offer lasting repairs, and ensure insurance claim compliance—all critical advantages for Niagara Falls property owners.
Look for contractors with local experience, strong certifications, and excellent reputations within the Niagara community. Check for affiliations with brands like CertainTeed and GAF, as these credentials reflect a commitment to quality and ongoing education in roof maintenance and repair. Ask for references, insurance details, and warranty information to protect your investment.
Questions to Ask a Niagara Falls Roofing Pro
Before scheduling a professional inspection or roof repair, ask your contractor:
How many years of experience do you have working on Niagara Falls homes and weather conditions?
Are you licensed, insured, and manufacturer-certified?
What specific issues do you check for after winter weather?
Can you provide before-and-after photos or references from similar projects?
What warranties do you offer on workmanship and roofing materials?
DIY Versus Professional Roof Inspection Checklist | ||
| Aspect | DIY Inspection | Professional Inspection |
|---|---|---|
| Tools Needed | Binoculars, flashlight, gloves | Specialty safety and diagnostic tools |
| Risk Level | Low, if ground-based only | Higher for complex repairs, safely managed by pros |
| What’s Detected | Obvious wear, missing shingles, clogged gutters | Hidden leaks, structural issues, subtle material failure |
| Recommended For | Routine, basic checks | Major repairs, suspected water damage, end-of-lifespan |
| Added Benefits | Cost savings for minor issues | Documentation for insurance, peace of mind |
“Some damage is only visible to a trained eye—schedule your spring roof inspection with confidence.”
Spring Roof Inspection Checklist: Niagara Falls Homeowners’ FAQs
What are early signs of water damage after winter?
Early warning signs include dark streaks or stains on rafters in the attic, bubbling or peeling paint on upper walls, and a musty odor that could point to hidden mold growth. On the roof exterior, look for missing shingles, granule piles near downspouts, and sagging rooflines. Catching these issues promptly prevents them from turning into major leaks and expensive roof repair projects.
How often should I perform a spring roof inspection checklist?
Niagara Falls experts recommend performing a spring roof inspection checklist every year—right after the last frost or snow melt. Regular inspections, at least once yearly, help identify new damage from winter weather and confirm that previous fixes are holding. For older or repaired roofs, consider seasonal checks before and after major storms to ensure your roof stays in peak condition.
Is roof repair or roof replacement necessary after minor winter issues?
For minor issues like a single missing shingle or a small stretch of loose flashing, a targeted repair is usually sufficient. However, if you notice repeated leaks, widespread shingle loss, structural sagging, or persistent granule loss, consult a professional for an assessment—these signs may indicate your roofing system is nearing the end of its useful life and a full roof replacement may be safer and more cost-effective than repeated repairs.
What roofing materials last the longest in Niagara’s climate?
Architectural asphalt shingles, metal roofing panels, and clay or concrete tiles tend to perform best. Each is chosen for durability and ability to withstand lake-effect weather. With routine inspection and proper maintenance, these roofing materials can last decades, providing Niagara Falls homeowners peace of mind through harsh winters and wet springs alike.
Key Takeaways: Protecting Your Home With a Spring Roof Inspection Checklist
Regular roof maintenance extends the life of your roofing system
Spring roof inspection checklist identifies small issues before they require major roof repair
Trust certified roofing contractors for critical repairs or replacement
Ready for Your Professional Spring Roof Inspection?
Call us at 716 284 1322 for a certified spring roof inspection checklist and protect your Niagara Falls home before the next big storm.
Keep your home safe and dry this year: follow this spring roof inspection checklist, handle minor issues early, and trust a local pro when the job gets big. Start your spring right!
If you’re interested in a more comprehensive look at roofing solutions and services tailored for Niagara Falls, explore the full range of options available from local experts. Discover how professional maintenance, advanced materials, and specialized services can further enhance your roof’s performance and longevity by visiting Fiddler Roofing’s premier solutions for Niagara Falls homeowners. Taking the next step with a trusted provider ensures your home is protected not just this spring, but for many seasons to come.